Push Notification (APNS) example
1. 앱에 푸시 추가
프로젝트 > TARGETS > Signing & Capabilities 에서 왼쪽 상단에 + Capability 선택
> Push Notifications 선택
> Background Modes 선택 > Remote notification 체크


2. 푸시 왔을 때 처리 코드
AppDelegate.h
- UserNotifications import
- UNUserNotificationCenterDelegate 추가
#import <UIKit/UIKit.h>
#import <UserNotifications/UserNotifications.h>

@interface AppDelegate : UIResponder <UIApplicationDelegate, UNUserNotificationCenterDelegate>
AppDelegate.m
- registerForRemoteNotifications
PUSH 등록
- application:didRegisterForRemoteNotificationsWithDeviceToken:
푸시 서비스 등록이 완료되었을 때 호출됨. 토큰 조회 가능
- userNotificationCenter:willPresentNotification:withCompletionHandler:
앱이 포그라운드 상태일 때 푸시 온 경우 호출됨
- userNotificationCenter:didReceiveNotificationResponse:withCompletionHandler:
사용자가 푸시를 터치했을 때 앱이 실행되며 호출됨
- application:didReceiveRemoteNotification:
앱이 푸시 받았을 때 호출됨
iOS3 - iOS10
- (BOOL)application:(UIApplication *)application didFinishLaunchingWithOptions:(NSDictionary *)launchOptions {
// Override point for customization after application launch.
[self registerNoti];
// 백그라운드에서 왔을 때 뱃지 0으로 변경
[UIApplication sharedApplication].applicationIconBadgeNumber = 0;
return YES;
}
#pragma mark - PUSH Setting
-(void)registerNoti {
if (@available(iOS 10.0, *)) {
if ([UNUserNotificationCenter class] != nil) {
// iOS 10 or later
// For iOS 10 display notification (sent via APNS)
[UNUserNotificationCenter currentNotificationCenter].delegate = self;
UNAuthorizationOptions authOptions = UNAuthorizationOptionAlert |
UNAuthorizationOptionSound | UNAuthorizationOptionBadge;
[[UNUserNotificationCenter currentNotificationCenter]
requestAuthorizationWithOptions:authOptions
completionHandler:^(BOOL granted, NSError * _Nullable error) {
}];
} else {
// iOS 10 notifications aren't available; fall back to iOS 8-9 notifications.
UIUserNotificationType allNotificationTypes =
(UIUserNotificationTypeSound | UIUserNotificationTypeAlert | UIUserNotificationTypeBadge);
UIUserNotificationSettings *settings =
[UIUserNotificationSettings settingsForTypes:allNotificationTypes categories:nil];
[[UIApplication sharedApplication] registerUserNotificationSettings:settings];
}
[[UIApplication sharedApplication] registerForRemoteNotifications];
}
//// 푸시에 사용할 디바이스 토큰을 받아오는 부분
-(void)application:(UIApplication *)application didRegisterForRemoteNotificationsWithDeviceToken:(NSData *)deviceToken {
const unsigned char *dataBuffer = (const unsigned char *)deviceToken.bytes;
NSMutableString *hexString = [NSMutableString stringWithCapacity:(deviceToken.length * 2)];
for (int i = 0; i < deviceToken.length; ++i) {
[hexString appendFormat:@"%02x", dataBuffer[i]];
}
NSString *result = [hexString copy];
NSLog(@"토큰 : %@", result);
}
#pragma mark - Push iOS10 이상
// 호출되는 조건
// 1. 앱 포그라운드 상태일 때 알림 오면 호출됨
- (void)userNotificationCenter:(UNUserNotificationCenter *)center willPresentNotification:(UNNotification *)notification withCompletionHandler:(void (^)(UNNotificationPresentationOptions))completionHandler API_AVAILABLE(ios(10.0)) {
NSDictionary *userInfo = notification.request.content.userInfo;
NSLog(@"푸시 데이터 : %@", userInfo);
completionHandler(UNNotificationPresentationOptionNone); // 포그라운드 상태에서 푸시왔을 때 푸시 마노출
// completionHandler(UNNotificationPresentationOptionAlert); // 포그라운드 상태에서 푸시왔을 때 푸시 노출
}
// 호출되는 조건
// 1. 앱 미실행 상태일 때 알림 터치하면 호출됨
// 2. 백그라운드 상태일 때 알림 표시된 후 알림 터치하면 호출됨
- (void)userNotificationCenter:(UNUserNotificationCenter *)center didReceiveNotificationResponse:(UNNotificationResponse *)response withCompletionHandler:(void(^)(void))completionHandler API_AVAILABLE(ios(10.0)){
NSDictionary *userInfo = response.notification.request.content.userInfo;
NSLog(@"푸시 데이터 : %@", userInfo);
completionHandler();
}
#pragma mark - Push iOS7 이상 ~ iOS10 미만
- (void)application:(UIApplication *)application didReceiveRemoteNotification:(NSDictionary *)userInfo fetchCompletionHandler:(void (^)(UIBackgroundFetchResult))completionHandler {
NSLog(@"푸시 데이터 : %@", userInfo);
// 뱃지 0으로 변경
[UIApplication sharedApplication].applicationIconBadgeNumber = 0;
if ([UIApplication sharedApplication].applicationState == UIApplicationStateInactive) {
// 백그라운드에서 푸쉬 수신 후 사용자 클릭으로 실행된 경우
} else {
// 앱 실행 중 푸쉬를 받은 경우
}
completionHandler(UIBackgroundFetchResultNewData);
}
3. APNS 인증서 생성
Apple 개발자 계정에서 Identifiers 이동
https://developer.apple.com/account/resources/identifiers/list
프로젝트 선택 후 Capabilites 에서 Push Notification enable 확인

Configure 선택 후 인증서 생성
Development SSL Certificate : 개발용
Production SSL Certificate : 배포용

CSR 파일 생성 및 업로드인증서 생성 후 Continue
CSR 파일 생성법 : https://help.apple.com/developer-account/#/devbfa00fef7

푸시용 인증서 생성 완료 및 Download (~.cer)

다운로드된 인증서를 더블클릭하여 키체인에 등록
4. 테스트
주로 사용했던 테스트 방법은 3가지
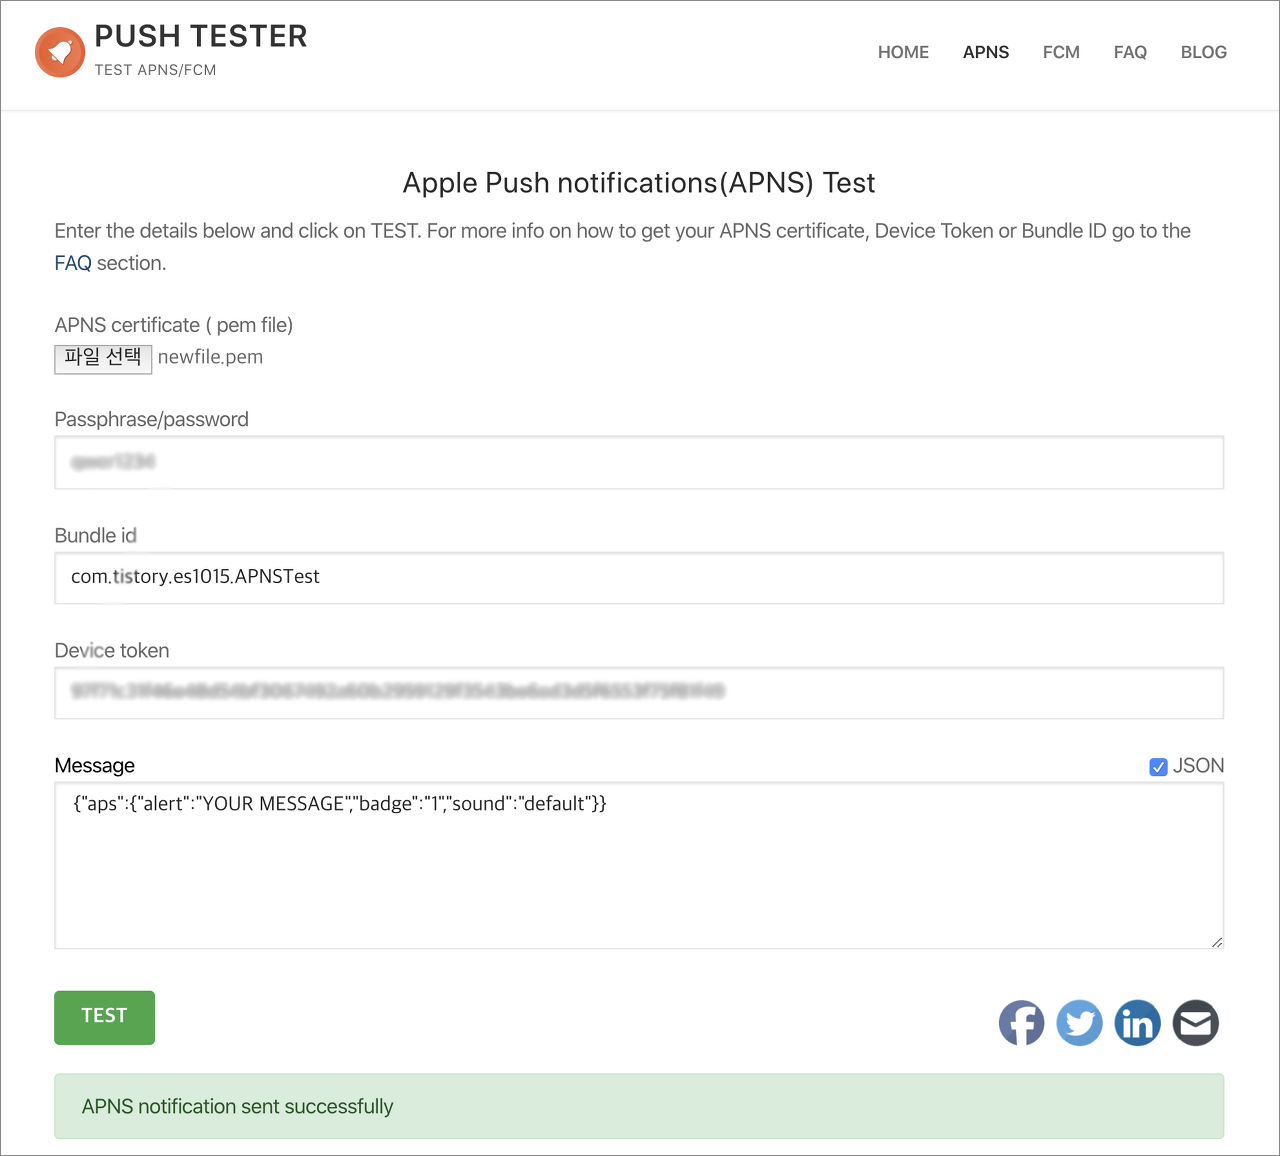
1) 웹사이트
https://www.apnstester.com/apns/
프로그램 다운이 없어서 가장 간단함
샌드박스 테스트 가능, 프로덕션용 테스트 불가

2) pusher
샌드박스, 프로덕션용 테스트 가능
3) APNS-Tools (APN easy Provider)
앱스토어에서 다운로드 가능
'iOS > Swift + Objective-c' 카테고리의 다른 글
| [iOS] 엔터프라이즈 배포 (내부 배포용 enterprise) (0) | 2020.03.21 |
|---|---|
| [iOS] Adhoc 용 IPA 생성 및 배포 (2) | 2020.03.10 |
| [iOS] 프레임워크 시뮬레이터 아키텍처 삭제 (platform doesn't have any non-simulator SDKs) (0) | 2020.03.06 |
| [objective c] custom font 사용하기 (0) | 2018.03.12 |
| [iOS: objective - c] framework & library 에서 custom font 사용하기 (0) | 2018.03.12 |